Purpose
This page purpose's is to introduce an Excel macro called "Quik2Code" with instructions to install and to provide use cases with examples.
Introduction
A research concept can be viewed as a collection of data elements with controlled vocabularies applied. At CDISC, we use the CDISC Controlled Terminology for identifying controlled vocabularies. To perform this task, a metadata developer often needed to cross-reference multiple spreadsheets; and, manually transcribe codelist contents by either re-typing or copy-and-pasting data. This mode of operation is not only tedious, but error-prone to typographical errors.
Quik2Code is designed to significantly reduce the manual intervention needed to create a research concept. It is an Excel macro with a user interface using data from the CDISC Controlled Terminology spreadsheet published quarterly. Use can make direct selection by checking off codelist values (controlled vocabularies) from a codelist. With click of a button, the macro will populate the selection in a predetermined format. Users will also be able to reverse lookup an existing list of controlled vocabularies. The tool will select codelist values found, as well as identify non-matching values that are either new vocabularies or typographical errors.
Installation
The following describes the steps to install Quik2Code on a Microsoft Windows PC:
| Steps | Visual Aid (Click image to enlarge) |
|---|---|
A. Create folder and place Quik2Code Excel macro file
| |
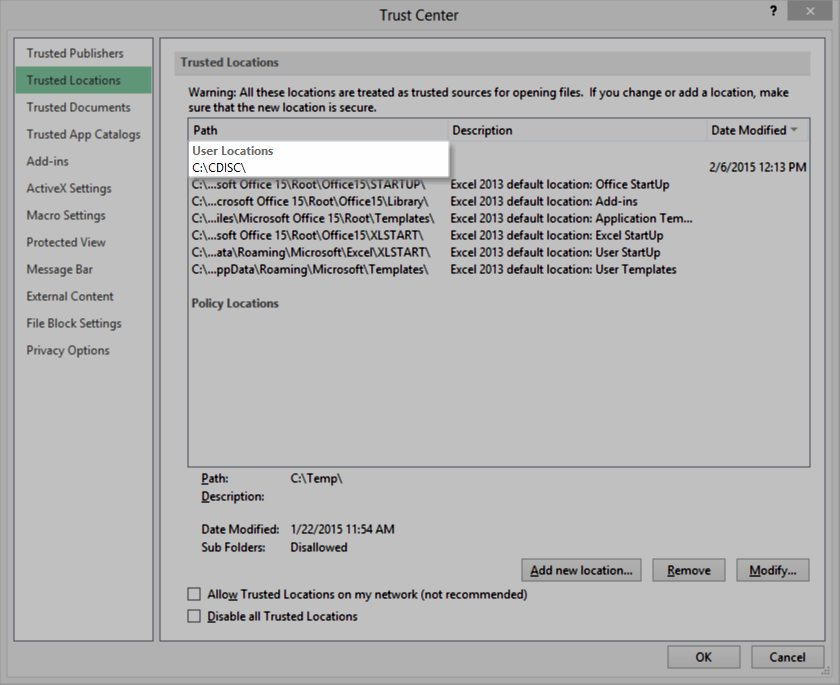
B. Add CDISC folder as a trusted folder for launching Excel macro
| |
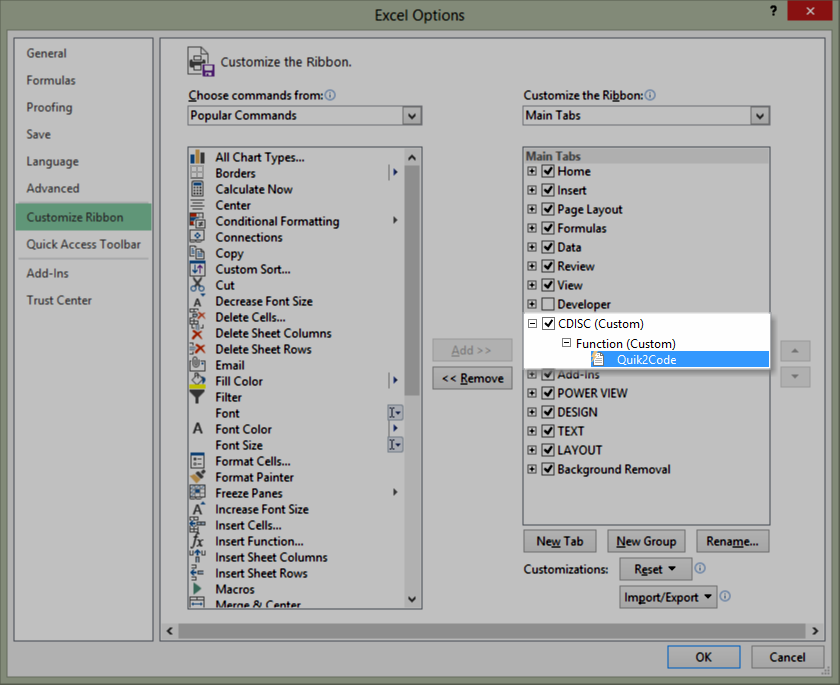
C. Create a customize Excel ribbon for Quik2Code (assuming Excel 2010 and 2013 versions)
| |
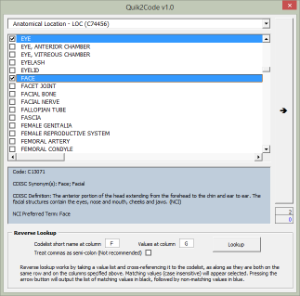
D.Verify Quik2Code Install
|
Use Case 1 - Direct Selection
Story: As a metadata developer, you want to pick out the commonly used codelist values from a codelist to constrain a research concept. The output will be a list of values with NCI EVS c-code, separated by semi-colon. To accomplish this using Quik2Code:
- Launch Quik2Code from the CDISC ribbon
- Select a codelist from the top down down box.
- A list of values for the selected codelist appears
- The codelists are listed using this nomenclature: <<CDISC Codelist Name>> - <<CDISC Submission Value>> for the codelist, followed by the <<Codelist Code>> in parenthesis, For example: Age Unit - AGEU (C66781)
- Check all the codelist values that apply
- Details of a selected codelist value, such as c-code, synonym(s), definition, and NCI preferred term will appear in the grey box below
- Click the arrow button to the right will output a value list
- For example, DAYS (C25301); MONTHS (C29846); YEARS (C29848) will display onto the active cell after selecting DAYS, MONTHS, and YEARS


