| Info |
|---|
|
20152018-0312-2526: New A patch version 1.1.2 is released to include CDISC COA Controlled Terminology, along with a couple of bug fixesuse the 4Q2018 (2018-12-21) release of CDISC Controlled Terminology. 2015-04-01: A patch version 1.1.1 is released to use the 1Q2015 (2015-03-27) release of CDISC Controlled Terminology. 2015-03-25: New version 1.1 is released to include CDISC COA Controlled Terminology, along with a couple of bug fixes. |
...
The following describes the steps to install Quik2Code on a Microsoft Windows PC:
| Steps | Visual Aid (Click image to enlarge) |
|---|
A. Create folder and place Quik2Code Excel macro file - Using File Explorer, on the C: drive, create a CDISC folder, i.e., C:\CDISC
- Place the Excel macro file quik2code.xlsm in it
|
|
|
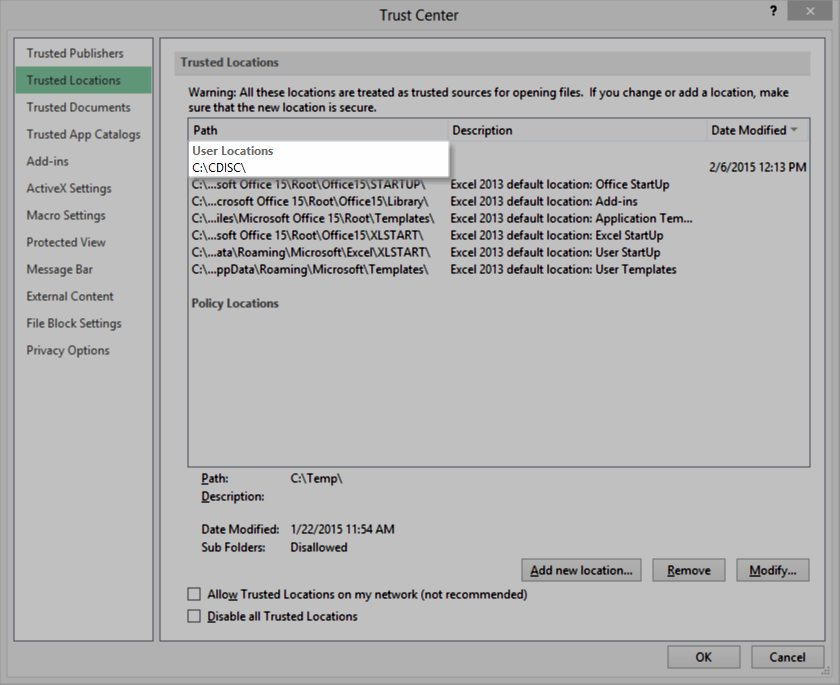
B. Add CDISC folder as a trusted folder for launching Excel macro - Open Excel
- Select File | Options. The Excel Options dialog box appears
- Select Trust Center on the left pane
- Click Trust Center Settings... The Trust Center dialog box appears
- Select Trusted Locations on the left pane
- Click Add new location... The Microsoft Office Trusted Location dialog box appears
- Type or browser to C:\CDISC as Path
- Click OK:
- The Microsoft Office Trusted Location dialog box closes
- C:\CDISC appears on the list of paths under Trusted Locations
- Click OK to close the Trust Center dialog box
| |
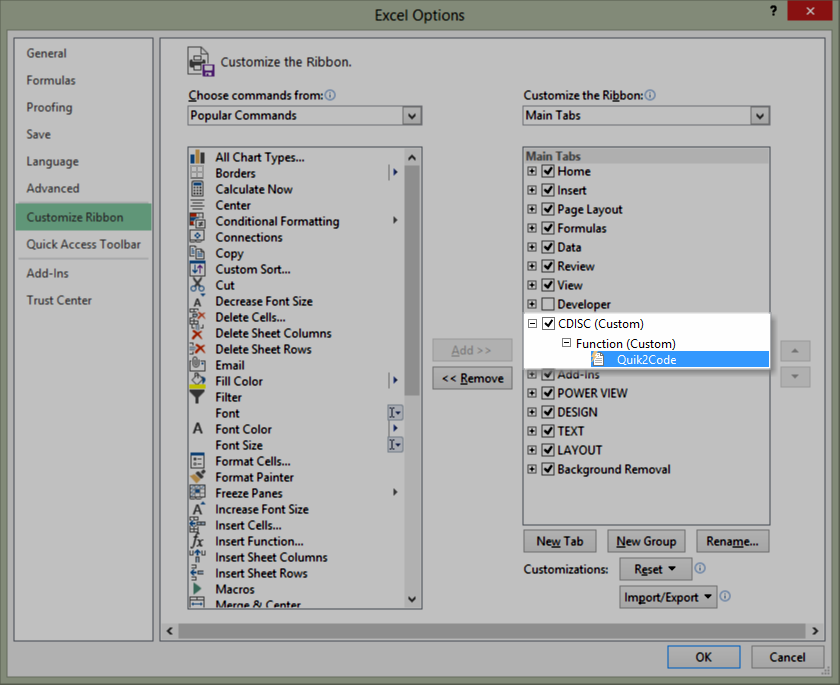
C. Create a customize Excel ribbon for Quik2Code (assuming Excel 2010 and 2013 versions) - Download this Excel UI customization file and place it into C:\CDISC folder
- Repeat Steps B1, B2 to bring back the Excel Options dialog box, if it is not already showing
- Select Customize Ribbon
- Click Import/Export at the lower right corner of the Excel Options dialog box
- Select the Import customization file option. The File Open dialog box appears
- Browse to the Excel UI customization file saved in Step C1
- Click Yes when prompted to replace ribbon
- An entry labeled CDISC (Custom) appears on the right side of the Excel Options dialog box
- Expanding the node will reveal Function (Custom)
- Expanding again will reveal Quik2Code
- Click OK to close the Excel Options dialog box
|  Image Modified Image Modified |
D.Verify Quik2Code Install - Select the ribbon labelled "CDISC" from the top menu
- Click the Quik2Code icon
- The CDISC Controlled Codelist spreadsheet appears and may obstruct Quik2Code. If so, minimize the CDISC Controlled Codelist spreadsheet
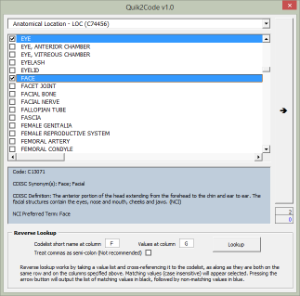
- The Quik2Code's user interface appears
|  Image Modified Image Modified
 Image Modified Image Modified
|
Use Case 1 - Direct Selection
Story: As a metadata developer, you want to pick out the commonly used codelist values from a codelist to constrain a research concept. The output will be a list of values with NCI EVS c-code, separated by semi-colon. To accomplish this using Quik2Code:
| Steps | Visual Aid (Click image to enlarge) |
|---|
| A. Launch Quik2Code from the CDISC ribbon |
|
|
B. Select a codelist from the top down down box - Click the drop down box to show a list of available codelist. A list of values for the selected codelist appear.
- Alternatively, enter a known codelist name into text area of the drop down box. Quik2Code will display a match, if available.
| Note |
|---|
The codelists are listed using this nomenclature: <<CDISC Codelist Name>> - <<CDISC Submission Value>> for the codelist, followed by the <<Codelist Code>> in parenthesis. |
| For example: Age Unit - AGEU (C66781)  Image Modified Image Modified
|
C. Check all the codelist values that apply - Click on a codelist value to select. A highlighted value will be included in the output.
- Click on a highlight to-deselect.
|
| Note |
|---|
- Selecting a codelist value will display its details in the light grey shaded area below.
- Some codelist values are long. Use the horizontal bar to scroll and view the entire text.
- Some codelists have many entries. Use the vertical bar to scroll and view the entire value set.
|
| For example, select 3 entries from the Age Unit codelist: DAYS, MONTHS, and YEARS  Image Modified Image Modified
|
D. Click the arrow button to the right will output a value list - Select a destination cell where an output shall appear
- Click the arrow button on the right. An output will appear in the destination cell.
| Note |
|---|
Semi-colon is used as delimiter to separate each value on the value list output. |
| For example, DAYS (C25301); MONTHS (C29846); YEARS (C29848) will display onto the destination cell  Image Modified Image Modified |
Use Case 2 - Reverse Lookup
Story 1: As a metadata developer, you want to re-conform an existing value list which may not be in the desirable format.
Story 2: As a metadata developer, you want to verify the validity of all codelist values on a value list. You also want to know the invalid values so that you can make corrective action.
| Steps | Visual Aid (Click image to enlarge) |
|---|
| A. Launch Quik2Code from the CDISC ribbon |
|
|
B. Configure the options in the Reverse Lookup section - For Codelist short name at column, enter the column (between "A" and "Z") where a codelist short name can be found. It will be used to cross-reference the value list.
- For Values at column, enter the column (between "A" and "Z") where a value list can be found. In other words, Values at columnx are members of the Codelist short name at column y.
- If any values may be delimited by commas, use the Treat commas as semi-colon option. Caution should be given when using this option, especially when many valid codelist values contain commas.
- Click Lookup:
- When a lookup is successful, the matching codelist will be displayed on the codelist drop down box.
- Each matching codelist value will appear selected.
- Non-matching codelist values will be cached for output (see Step C below).
- Notice the two counters below the arrow button:
- The upper counter shows # of matches.
- The lower counter shows # of mismatches for each reverse lookup.
|  Image Modified Image Modified
|
C. Click output and review - Select a destination cell where an output shall appear
- Click the arrow button to output
| Note |
|---|
- Matching is case-insensitive
- Matched values will appear in black.
- Non-matching values will appear after the matched ones, in blue without c-code
|
|  Image Modified Image Modified
Additional examples and outputs:  Image Modified Image Modified
|


